September

September
Showing posts with label Self Reliance. Show all posts

Saturday, April 7, 2012

How to Preserve Every Kind of Citrus Juice

As a follow up to my recent blog about bottling citrus, I wanted to also share the instructions for bottling citrus juice.  I did orange and grapefruit juices but the process is the same.  Again, there are the instructions for this in the Ball Blue Book for canning.  (You really need to have this book in your library! http://www.freshpreservingstore.com/ball-blue-book-guide-to-preserving/shop/229696/ )

Bottling Grapefruit Juice

Wash grapefruit and drain.  Extract juice from fruit and strain.  Combine juice with sugar to taste if desired, (*I did not add any sugar to mine.  I like it a bit tart anyway.)  

Heat juice for 5 minutes or until it reaches the temperature of 190°.  DO NOT LET IT BOIL!  Meanwhile, warm up the jars in a warm oven or dishwasher. 


Ladle hot juice into warmed jars, leaving a ¼ inch head space.  Adjust 2 piece caps as usual onto the jars and process pints and quarts for 15 minutes in a boiling water canner. 
That is it!  Easy peasy!   Now you will have your “fresh squeezed” juice all summer long.  It has only been a month since I did mine and it tastes as fresh as the day I squeezed it and bottled it. 

Lemon Juice

The best way I have found for preserving lemons is to simply clean the fruit and pop them into a freezer zip lock bag and put them in the freezer.  You usually don’t need much lemon juice to use in recipes so it isn’t worth bottling it.  Then anytime I need lemon juice, I pull out 1-3 lemons a couple of hours ahead of time and let them thaw.  I get all the juice I need.  The only thing this doesn’t work for is if you need some lemon zest.  The thawed lemon peel is too mushy to get zest off of it. 

Anyway, I hope you will try your hand at bottling citrus, whether you grow it or purchase it when it is on sale and it will save you a lot of money! 

Tuesday, March 20, 2012

Need An Excuse to Watch 5 1/2 Hour of Pride and Prejudice? Bottle Citurs!

We moved to Arizona in 1982 when my husband came to ASU to get a graduate degree.  We loved it so much that we never left.  However there is something that has bothered me throughout the many years we have been here that I couldn’t get the answer to until this year.  The question was, “how do you bottle or preserve all the citrus that grows here?” 
Having "fun" sectioning the Grapfruit.  This is where the 5 1/2 hours of "Pride and Prejudice comes in!
Over the years I had contacted the County Extension Service, did research in recipe books and on the internet, checked in my Ball Blue Book (the Bible for home canning), but never found any instructions or ideas EXCEPT for orange marmalade (not a fan).  I was lamenting out loud again last year when I saw all my citrus going to waste.  Of course my husband insisted that he could find the answer and I assured him that there was no way and that I had checked every possible place for an answer and that it just wasn’t possible.  He grinned and confidently told me he would find one. 

Well, much to my frustration, he did find some!  And not only did he find some, he found video instructions and also informed me that Ball had come out with a new version of their Ball Blue Book (mine was 20 years old), that had the instructions on how to bottle grapefruit segments and citrus juices.  Don’t you just hate it when that happens!  I didn’t stay mad long because I was so excited!  I had to wait a few months but last week I had 4 of my daughters over (#5 lives in North Carolina), and we bottled my citrus!  First we did the grapefruit sections, then orange juice and ended with grapefruit juice.  Here are the directions for the segments from the Ball Blue Book: 

Grapefruit Sections
            2-2 ½ lbs of grapefruit per quart
            Sugar
            Water

Wash grapefruit, drain.  Peel grapefruit, cutting deep enough to remove white pith.  Cut membrane away from pulp for each section; lift out the pulp without breaking the sell structure.  Discard seeds.  Make a light syrup; keep syrup hot pack grapefruit into hot jars, leaving ½ inch headspace.  Ladle hot syrup over grapefruit leaving ½ inch headspace.  Remove air bubbles.  Adjust two-piece caps.  Process pints and quarts in a boiling water canner. 

Softening the lids in hot water. 

I mixed the yellow and pink grapefruit because I liked the look of it in the jars. 

Bruce also found a youtube video of someone canning the segments if you want to watch it.  Here is the link:  http://www.youtube.com/watch?v=bkyl2n51ClQ&feature=youtube_gdata_player 

I will post the juice process in a few days so stay tuned! 
A few of many jars

Friday, August 20, 2010

For Lasagna, Who Needs Electricity? All You Need is the Sun!

I have told you about the great product called the Solar Hot Pot, and for those of you who live in places where there is an abundance of sun, like here is AZ, it will save a lot of money on your electric bills. I recently made a recipe called “Skillet Lasagna” that has been a family favorite for years, but instead of heating up the kitchen using the stove top, I thought I would try it in the Hot Pot on the pool deck and see if it would work.


In the morning I browned the Ground beef and onion (recipe is at the end of the post). Then I added half a jar (2 cups) of spaghetti sauce. Use your favorite brand, any one will work. I use sauce that I make and bottle here at home. After it is mixed in I put the meat mixture into the hot pot. Now this next step is different than the recipe but I then layered the cottage cheese, then the noodles (uncooked), and topped it with the Italian spices, the can of crushed tomatoes and the remainder of the spaghetti sauce.

I covered it and place it into the reflector that was set up on a table on our pool deck. Now I just had to watch it and rotate it to follow the sun about every 30-45 minutes. After 4 hours, I topped it with the shredded mozzarella cheese and let it cook for an additional 15-20 minutes or until the cheese has melted.

It turned out perfectly! The noodles were cooked to perfection and it tasted great.

If you don’t want to invest in a Solar hot pot, I have seen instruction online about how to make your own homemade version so try it out if you want to experiment before buying one. Although I promise, once you try it you will love it!

Here is the recipe for the Skillet Lasagna:

Skillet Lasagna
1 pound ground beef
¼ c. chopped onion
1 16oz can diced or crushed tomatoes
1 quart spaghetti sauce
1 ½ t Italian seasoning
12oz cottage cheese
2 c. uncooked egg noodles
16oz shredded mozzarella cheese

Brown beef and onion, then drain. Pour tomatoes and Italian seasoning over meat. Layer cottage cheese, noodles and spaghetti sauce over meat and tomatoes. Simmer, covered, for 20-25 minutes until noodles are soft. Last minutes, sprinkle cheese on until melted.

This is the site that I bought mine at:  www.solarovens.net/ 

Friday, July 16, 2010

Don’t be caught in a natural disaster without a few of these filled up!!!

On all of the emergency preparedness sites, one of the main things that is suggested that you have on hand is a small amount of cash, 5-7 days worth. Not only do you need the cash but you need it in small denominations.

Let me explain why.

During any natural disaster, the first thing to go is electricity. Now, if you don’t have electricity, you can’t get money at the bank or any ATM’s, or you can’t purchase anything from stores without the exact cash on hand.  This means, if you need water food or batteries, you could be paying more than it is worth if you don’t have the right amount of cash. I saw this in England 3 years ago while visiting. There was a terrible flood when the Thames over flowed and many villages were completely cut off. The stores had to start rationing water, so you were only able to get 2-3 flats. Since there was no electricity, many flood victims had to pay 20 pounds, for 2-3 flats of water which would normally have only cost around 10-12 pounds. And that is assuming the smallest bill you had was a 20.  The same thing happened during Katrina and numerous Earthquakes. 

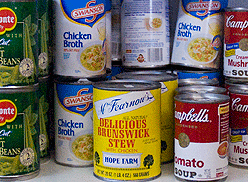
Therefore, it is recommended that you keep 1’s, 5’s, and 10’s in a stash at your home. So the question arises, where is a safe place to keep 5-7 days of cash at home? Here is one answer. They are called Diversion Safes. You just unscrew them and put the small bills inside, close them and put them on the appropriate shelf.  There are many different products that you can choose from to hide you cash stash in. Here are a few choices:


I have even seen cans of vegetables, soups, fruits, just about anything you could find in a grocery store.  Just “google” diversion safes, and find the best price, or here are a few sites that I have found:

www.amazon.com/s/ref=nb_sb_noss?url=search-alias%3Dtools&field-keywords=diversion+safes

http://selfdefenseproshop.com/products.php?cat=54 

www.personalsafetyshop.com/WBCATE?PMCTNO=0000000026&PMVMOD=R

www.einvestigator.com/spy_equipment/hidden_diversion_safes.htm 

Keep a few in different places in your home and most important, remember where and what they are. We had a visitor once who tried to open an A&W root beer but it wouldn’t open and he couldn’t figure out how or why. He eventually realized what it was but he was disappointed at not being able to have a root beer. It was funny!

If you don’t want to purchase a diversion safe, find a safe place to keep you store of cash. It is so important!!

Tuesday, May 11, 2010

We Can't Live Without This!!!

How long can you live without water???
In case of an emergency, Water is the most important thing we need to have available to us.  Three years ago my friend Kim and I were visiting Oxford, England at the time that the Thames River over ran it's banks and flooded the whole Thames valley.  Many villages were cut off and the first thing to disappear was freash drinking water.  They had to have water brought in on boats in some cases.  It was a crazy week.  We also saw this same thing when Katrina hit in New Orleans.  Water was the most needed commodity.  I still remember the pictures of frustrated Moms and children crying for water or bottles of milk for infants.  It was gut-wrenching! 

If you think you are prepared for an emergency because you have food, but no water, forget it!  You will die in 3-4 days without water, where you can live without food for a few weeks! 


There are several sites that have safe water storage guidlines but I have selected the ones from FEMA to have here.  I have tweeked it somewhat.  For example, FEMA suggests you have a 3 day supply of water which is fine for an immediate emergency but a 2 week supply is much better.  Here are the guidelines from FEMA:

Water Storage Guidelines from FEMA

Commercially bottled water in PETE (or PET) plastic containers may be purchased. Follow the container’s “best if used by” dates as a rotation guideline. Avoid plastic containers that are not PETE plastic.
If you choose to package water yourself, consider the following guidelines:

Containers

• Use only food-grade containers. Smaller containers made of PETE plastic or heavier plastic buckets or drums work well.

• Clean, sanitize, and thoroughly rinse all containers prior to use. A sanitizing solution can be prepared by adding 1 teaspoon (5 ml) of liquid household chlorine bleach (5 to 6% sodium hypochlorite) to one quart (1 liter) of water. Only household bleach without thickeners, scents, or additives should be used.

• Do not use plastic milk jugs, because they do not seal well and tend to become brittle over time.

• Do not use containers previously used to store non-food products.

Water Pre-treatment

• Water from a chlorinated municipal water supply does not need further treatment when stored in clean, food-grade containers.

• Non-chlorinated water should be treated with bleach. Add 1/8 of a teaspoon (8 drops) of liquid household chlorine bleach (5 to 6% sodium hypochlorite) for every gallon (4 liters) of water. Only household bleach without thickeners, scents, or additives should be used.

Storage

• Containers should be emptied and refilled regularly.

• Store water only where potential leakage would not damage your home or apartment.

• Protect stored water from light and heat. Some containers may also require protection from freezing.

• The taste of stored water can be improved by pouring it back and forth between two containers before use.

Additional Information

               www.fema.gov/plan/prepare/water

               www.redcross.org/services/prepare

Water-How Much Water do I Need?

You should have at least a 2 week supply of water and you should store at least one gallon of water per person per day. A normally active person needs at least one-half gallon of water daily just for drinking.

Additionally, in determining adequate quantities, take the following into account:

• Individual needs vary, depending on age, physical condition, activity, diet, and climate.

• Children, nursing mothers, and ill people need more water.

• Very hot temperatures can double the amount of water needed.

• A medical emergency might require additional water.


***Note:  One preparedness site suggests you also want to have a  small amount of cash on hand in small bills so you can buy bottled water.  Otherwise, you may have to pay a lot more for the water if no change is available due to electricity being out. 

Saturday, April 10, 2010

The Greatest Product for Organization!

I have found the greatest product if you want to organize and effectively rotate your canned goods in your cupboard or storage room. Let me tell you about it!

Most Emergency Preparedness sites encourage you to have a supply of food on hand for emergencies. It can range from a 72 hour emergency food kit to up to 1-2 years of food. In our church, they encourage us to get a 3 month supply of food you eat every day, and then begin to accumulate a longer term food supply that includes wheat, rice, dried beans etc. The problem with this, is finding the space to store it and how to rotate it efficiently. I have been very creative in “hiding” the food almost everywhere in our home since we don’t have a basement or a large storage space for food.

I recently received a handout for a product that helps with the rotation, storage and organization of canned goods. They are called, Can Organizers. They are cardboard boxes that fold into units that you load the can into the top and it rolls around to the bottom, so you are constantly rotating the cans you buy! It is amazing, and INEXPENSIVE!!! I have purchased plastic shelving that does this but they are costly so I was so excited to try these!

They come in 2 sizes, a cupboard size and a pantry size. They eliminate the need to but special shelving units that do the same job! The cupboard size holds; 6 pie fillings, 8 vegetable cans, 9 soup cans, or 18 tuna fish cans. The Pantry size holds; 13 pie filling, 16 vegetable cans, 18 soup cans, or 39 tuna cans. I love them! The web-site to see the product is:  http://www.thecanorganizer.com/
The printed instructions for folding them is not very good, but there is a video on the web-site that shows how to do it and it only takes a couple of minutes once you see how it is done.

Check it out!!!

Monday, March 15, 2010

My New Patnership...But I STILL Hate Birds!


4 of my grandkids and a friend in front of our chicken coop

I have wanted to get chickens for several years, but was unwilling to give up any of my garden for them to live in. I didn’t want to lose my “Alice Garden”, my “Train Garden”, the Sandbox/play area for the grandkids, so I was frustrated as to how I could have chickens that I could get eggs from. I finally came up with a solution! My son in-law, Sam, and daughter live in a more “rural” part of Mesa where he helps his dad breed and raise Rocky Mountain horses (here is a link to his web-site for the horses:    http://www.rockyjohn.com/index.htm ) .

Sam, my "project manager" and son in-law, is the first on the left

I thought of asking him if he had a corner of their property where I could set up a chicken coop and buy some chickens to put in it and we could share the eggs. I figured I could get down there every day to feed them, since it is only 5 minutes from our house and I promised to do all the work. He was so enthusiastic about the idea that I haven’t had to do anything else. I have luckily become the silent partner in this project. He was able to find a coop that his brother was no longer using and he got some friends and family to help him move it to their property. I had planned on just a few, 5-6 chickens but this coop is so big that he thinks we could get up to at least 20 chickens in it.

He also has a few pigeons in it that he uses to help train his hunting dogs which he also raises (he is such a talented GUY!).

Pigeons in the coop...YUCK!

The first addition to the coop was a rooster that a friend, Jill, had and wanted to get rid of. Then we got a
a few laying hens.


Why is the rooster the most colorful one!?!?!

Last week we got some chicks that a school teacher here in Mesa had hatched in her class room. She didn’t want them after they had hatched and Jill, the friend who gave us our starter rooster, contacted us to see if we wanted them because she didn’t need any more chickens right now.

Miss G and Miss E introducing me to our chicks

They are so cute! My granddaughters introduced me to each of the chicks and told me the names of each of them, including Cutie Pie, Banana Bread, Blackie, and “Sticky”. They named him that because he has dried poop on his behind!


The chicks are too young to go into the coop yet but will be added when they are bigger. I have received about 2 dozen eggs so far, including 2 pigeons eggs that I just can’t bring myself to eat yet…I HATE PIGEONS! But the other eggs have been amazingly good!

My first eggs!

Anyway, this project has turned out great, especially for me, since I am the silent partner and just get to share in the eggs. Thanks to Sam, my great son in-law!

Tuesday, February 23, 2010

Being Self-Reliant Makes Good Sense!


A few months ago I listed a couple of recipes that most or all of the ingredients could be stored on a shelf for a long term. I wanted to add 2 more recipes to that list. There are multiple emergency preparedness web-sites that encourage safe food storage for emergencies. Some list a 3 day supply up to a 3 month supply or more depending on the emergency.


Fema (http://www.ready.gov/) recommends a 3 day for emergencies. Other sites suggest you prepare for the “rainy day” scenario like being out of work and suggest 3-12 month supply of food. Whatever the reason, it is just wise to have extra food on hand for emergencies.


Here are a couple of recipes that my family enjoys and all the ingredients can be kept on the shelf for a long time.

Crock Pot Stroganoff
1 ½ lb round steak-cut up into small pieces (or used bottled or canned beef)
2 cans cream of celery soup
2 cans cream of mushroom soup
1 pkg onion soup mix
Mix everything in a crock pot. Cook for 8 hours. 3 hours on high and 5 hours on low. Stir in sour cream is you desire but it is not necessary. Serve over noodles or rice. (if using bottled meat, you do not need to cook as long and you can do it on a stove top instead of a crock pot).


Company Apricot Chicken
1-2 lbs. boneless skinless chicken breasts(can use bottled or canned chicken)
8 oz bottle of Russian dressing
12 oz jar apricot preserves
2-3 c prepared rice
Arrange chicken in a slow cooker; set aside. Combine salad dressing and preserves; pour over chicken. Cover and cook on low setting for 6-8 hours. Serve over rice.  (to use bottled chicken, just drain chicken and put in crock pot. Cover with dressing mixture and heat through, 2-3 hours on low. It won’t need to cook as long since the chicken is already cooked, just enough to get the flavors to mix).

 You may ask yourself, “how do we cook this if there is an emergency and no power available”? I have given 2 examples in past blogs (look under “self-reliance” for past posts) and those are solar cooking or a box oven. Another option is butane cook tops. These are small and easy to store, but you do need to stay on top of the expiration dates of the butane canisters and replace them when needed. Just "google" or search for it if you want more information on these, but I have found the best price for these are at Oriental or Asian markets. They carry them regularly in our Oriental markets and you can get one for under $30. Check it out!